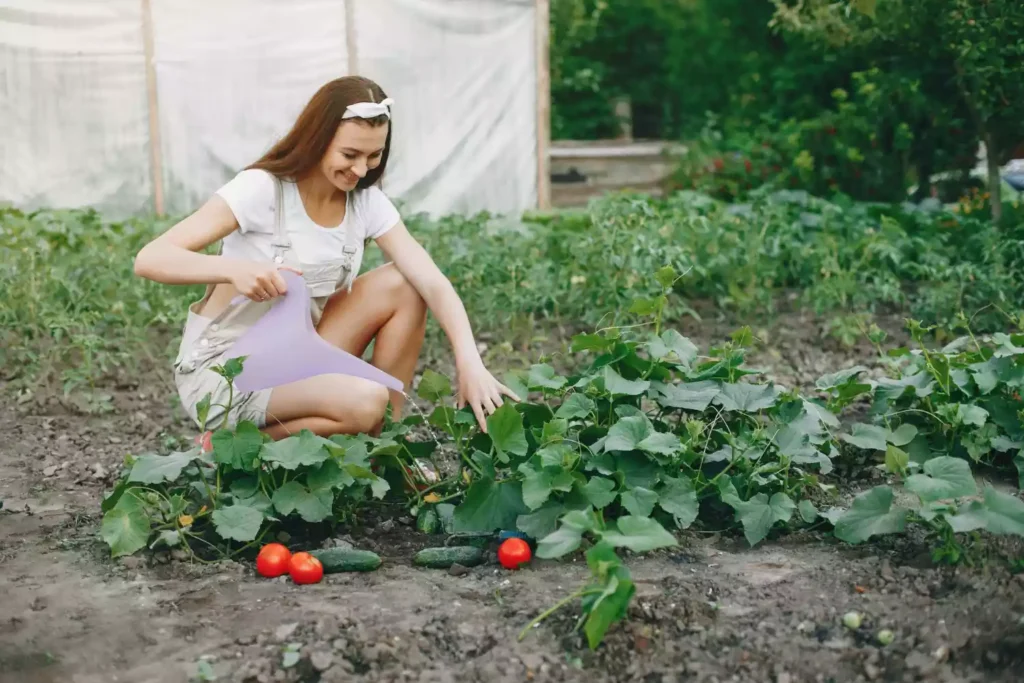
I know what you’re thinking. Worms? Really? Trust me, I used to feel the same way. But as I’ve learned more about vermiculture and the amazing benefits of using red wigglers to compost organic waste, I’ve become a true believer. And one of the most fascinating aspects of these little critters is their incredible reproductive rate.
If you’re like me, you might be wondering just how fast red wigglers can breed. After all, the success of any worm composting operation depends on maintaining a healthy and productive population. But fear not – I’ve done the research and can share all the details on how often these worms reproduce, what factors affect their breeding rate, and how you can encourage them to breed even faster.
So, let’s dive into the world of red wigglers and uncover their secrets of reproductive prowess.
What Are Red Wigglers?
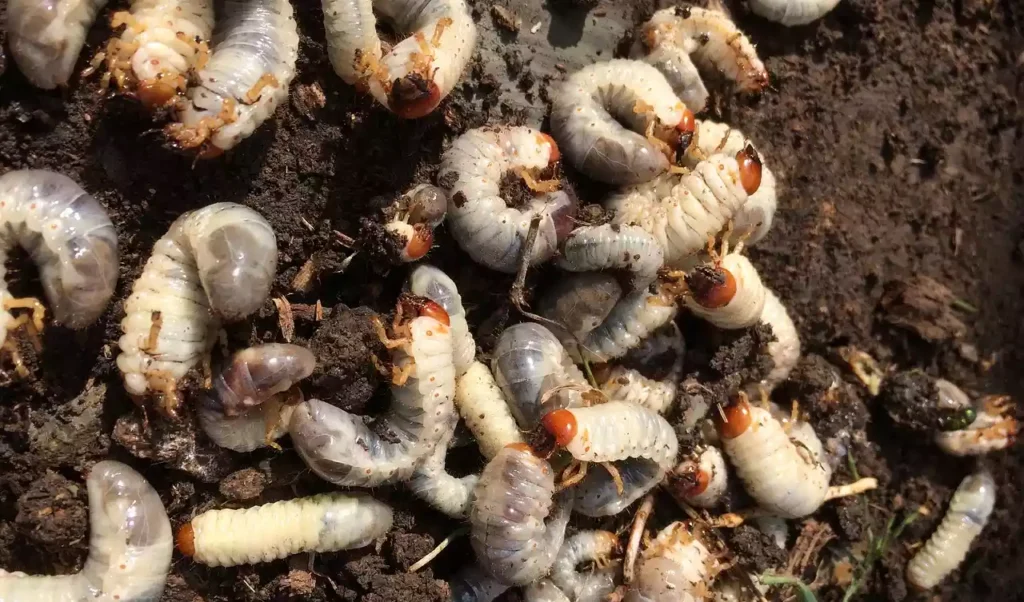
The section on Red Wigglers provides valuable information on the biology and behavior of these composting worms. It sheds light on their impressive ability to transform food waste into nutrient-rich castings. Red Wigglers, also known as Eisenia fetida, are a species of earthworms commonly used for vermicomposting. They have a voracious appetite and quick reproduction rate.
These worms are typically reddish-brown in color and can grow up to 3 inches in length. They thrive in temperatures between 59-77°F and prefer a moist environment with a pH level between 6-7. Red Wigglers are known for their ability to consume up to one third of their body weight in food per day. This makes them an efficient and effective way to recycle household food waste.
With the right conditions, these tiny creatures can quickly populate a worm bin and produce an abundance of nutrient-rich castings for your garden.
How Fast Do Red Wiggler Worms Reproduce?
By the time you finish reading this section, you’ll have a wriggling army of composting machines multiplying quicker than bunnies in springtime.
Red wiggler worms can reproduce at an astounding rate, with each worm being capable of laying up to 4-5 eggs per week. These eggs will hatch in about 2-3 weeks, with the newly born worms reaching sexual maturity in just 3 months. With optimal conditions, a single red wiggler can produce up to 96 offspring in a year.
But the real magic happens when you have multiple worms reproducing in a single bin. With just 100 worms, you can have up to 9,600 worms in just one year!
This exponential growth is why worm composting is such an efficient and effective method of recycling food waste. By providing a comfortable home with plenty of food and moisture, you can create a thriving ecosystem that will not only reduce your carbon footprint but also produce rich, nutrient-dense worm castings for your plants to thrive.
How Often Do Red Wigglers Reproduce?
Get ready to be amazed at how frequently these composting machines can multiply and create a thriving ecosystem in your worm bin.
Red wigglers are incredibly prolific breeders, with the ability to reproduce every 7-10 days under optimal conditions. This means that a single pair of worms can potentially produce up to 1,500 offspring in just one year!
But how do red wigglers reproduce so quickly? It all starts with the mating process. Red wigglers are hermaphrodites, meaning they have both male and female reproductive organs.
During mating, two worms will line up head to tail and exchange sperm packets. Each worm will then use the sperm to fertilize their own eggs and lay cocoons.
These cocoons hatch into tiny, translucent baby worms that will grow quickly with the right conditions.
How Do You Encourage Red Wiggler Worms To Breed?
So, you want to encourage your red wiggler worms to breed? Well, there are a few things you can do to help them out.
First, watch the temperature of your bin – worms like it between 60-80°F.
Second, keep the bedding moist but not too wet.
Third, check the pH of your bin to make sure it’s not too acidic or alkaline.
Fourth, feed your worms well with a balanced diet of food scraps.
And finally, keep pests out to ensure a healthy worm population.
Step #1: Watch The Temperature
Monitoring the temperature is crucial in ensuring the success of your vermicomposting bin, but have you ever wondered how quickly these little creatures can multiply? Here’s what I’ve learned:
- Keep the temperature between 60-80°F: Red wigglers thrive in a temperature range of 60-80°F, with 70°F being the ideal temperature for breeding. If the temperature drops below 50°F or goes above 85°F, the worms will become less active and may even die. Use a thermometer to monitor the temperature in your bin regularly, and make adjustments as necessary.
- Provide a moist environment: Red wigglers need a moist environment to breathe and move around. If the bedding becomes too dry, the worms will become stressed and may stop breeding. On the other hand, if the bedding becomes too wet, the worms will drown. Aim for a moisture content of 70-80% in your bin, and add water or dry bedding as needed.
- Feed them a balanced diet: Red wigglers need a balanced diet of nitrogen-rich greens and carbon-rich browns to thrive. If the bin becomes too acidic or too alkaline, the worms will become stressed and may stop breeding. Aim for a pH of 6.5-7.5 in your bin, and feed the worms a variety of food scraps, such as fruit and vegetable peels, coffee grounds, and eggshells.
By monitoring the temperature, providing a moist environment, and feeding them a balanced diet, you can encourage red wigglers to breed and multiply in your vermicomposting bin. With a little patience and care, you’ll soon have a thriving population of worms that can help you turn your food scraps into nutrient-rich compost for your garden.
Step #2: Keep Bedding Moist
To ensure the success of your vermicomposting bin, you’ll want to keep the bedding moist and breathe life into your composting ecosystem.
The moisture level of the bedding is crucial for the worms to thrive and reproduce. If the bedding is too dry, the worms will not be able to move through it easily, and they will not be able to absorb the nutrients they need to grow. On the other hand, if the bedding is too wet, it can cause the worms to drown or encourage the growth of harmful bacteria.
To maintain the proper moisture level, you can add water to the bedding as needed. A good rule of thumb is to add enough water so that the bedding feels like a wrung-out sponge. You can also add food scraps that contain moisture, such as fruits and vegetables, to help keep the bedding moist.
Remember to mix the bedding and food scraps thoroughly to prevent any areas from becoming too wet or dry. By keeping the bedding moist, you will create a healthy environment for the worms to thrive and reproduce, leading to a successful vermicomposting bin.
Step #3: Check The pH
Maintaining the ideal pH level is crucial for happy worms and a thriving vermicomposting bin – it’s the cherry on top of your already moist and nutrient-rich bedding that’ll make your worms sing with joy! Checking the pH level of your worm bin is a simple process that can ensure the health and productivity of your worms.
To check the pH level of your worm bin, follow these four easy steps:
- Collect a small sample of bedding and castings from your worm bin.
- Add a small amount of distilled water to the sample and mix it together.
- Dip a pH test strip into the mixture and wait for the color to develop.
- Compare the color on the test strip to the pH chart to determine the pH level of your worm bin.
Maintaining a pH level between 6-8 is ideal for your worms to thrive. If the pH level is too low (acidic), add crushed eggshells or dolomite lime to raise it. If the pH level is too high (alkaline), add a small amount of vinegar or citric acid to lower it.
By checking the pH level regularly, you can ensure that your worms are happy and healthy, and producing nutrient-rich castings for your garden.
Step #4: Feed Worms Well
Make sure your worms are well-fed by providing them with the appropriate amount of food scraps based on their population size and avoiding overfeeding. Overfeeding can lead to uneaten food piling up in your worm bin, which can create odor issues and harmful conditions for your worms.
It’s important to remember that worms will consume their bedding material as well, so don’t worry about them starving if you don’t have enough food scraps. To determine how much food to feed your worms, it’s best to start slow and gradually increase the amount as they reproduce and grow in population.
For Red Wigglers, the recommended starting density is 1/2 lb per square foot. Based on this, if you have a 2 square foot bin, you should start with 1 lb of worms and feed them approximately 1/4 lb of food scraps per day. Keep an eye on your worms and adjust the amount of food scraps accordingly. As they reproduce and grow in population, you can gradually increase the amount of food you feed them.
Remember to always avoid overfeeding, as it can lead to harmful conditions for your worms and unpleasant odors in your home. Providing adequate food for your worms is crucial for a successful vermicomposting experience. By following these guidelines and adjusting the amount of food based on your worm population size, you can ensure that your worms are healthy, happy, and producing nutrient-rich worm castings for your plants and garden.
Happy composting!
Step #5: Keep Pests Out
So, we’ve covered how many worms you need and how to set up their habitat. But now, let’s talk about keeping pests out of your worm bin.
Mites, Springtails, and ants can all be harmful to your worm population. To ensure their safety, it’s important to take preventative measures to protect your worms from these pests.
Protect them from mites
To keep those little pests at bay and ensure your worm population stays healthy, it’s important to take steps to protect your wriggly friends from pesky mites.
These tiny arachnids can cause damage to both your worms and their habitat, and can quickly spread if not properly managed.
One way to prevent mites from becoming a problem is to avoid overfeeding your worms, as excess food can attract these unwanted guests.
Additionally, keeping your worm bin well-ventilated and avoiding excessive moisture can also help deter mites.
Regularly inspecting your bin for signs of mites and removing any affected materials can also help keep your worms safe and healthy.
By taking these simple precautions, you can help ensure that your red wigglers continue to thrive and reproduce at a healthy rate, providing you with plenty of nutrient-rich worm castings for your garden or indoor plants.
Protect them from Springtails
Now that we know how to protect our red wigglers from mites, let’s talk about another pesky critter: springtails.
These tiny insects can be found in moist environments and can sometimes invade worm bins. While they don’t necessarily harm the worms, their presence can indicate that the bin is too moist and lacks proper aeration.
To prevent springtails, it’s important to maintain a balanced moisture level in the bin and ensure proper ventilation. Regularly fluffing the bedding and adding dry materials like shredded paper can also help absorb excess moisture.
By taking these preventative measures, we can keep our red wigglers happy and healthy, and continue to reap the benefits of their fast reproduction and nutrient-rich castings.
Protect them from ants
Preventing pesky ants from infiltrating your worm bin is pivotal to preserving the population and producing pristine castings. Ants are attracted to the food scraps in your bin, and can disrupt the delicate balance of your composting system.
To keep ants at bay, it’s important to ensure that the bin is properly sealed and that there are no cracks or openings for them to enter. Additionally, you can create a barrier around the base of the bin using diatomaceous earth or cinnamon to repel ants.
It’s also important to avoid overfeeding your worms, as excess food can attract ants and other unwanted pests. By taking these preventative measures, you can keep your worm population thriving and produce high-quality compost for your garden.
How many red wigglers does it take to start a worm bin?
You only need a small number of these wriggly creatures to start your compost bin, allowing them to gradually populate the space and create nutrient-rich castings for your plants.
When starting a worm bin, it’s important to calculate the number of worms needed based on the amount of compostable food waste your household produces. For a family of four creating 2lbs of food waste daily, 16lbs of worms are needed to consume it all.
It may seem like a lot, but starting with just a few pounds of worms and allowing them to reproduce naturally will lead to a thriving worm population in no time. Plus, the benefits of vermicomposting far outweigh the initial investment.
Not only will you be reducing your household’s contribution to landfills, but you’ll also be creating a valuable resource for your plants and garden. So go ahead and take the plunge – your plants will thank you for it!
How much will 1000 red wigglers eat?
Imagine having a thousand little composting helpers munching away at your food waste, but how much can they really eat? Well, the answer depends on a few factors.
Red wigglers, like other composting worms, can consume about one third of their weight in food scraps per day. So, if we have 1000 red wigglers, which weigh a total of about 1 pound, they can consume about 1/3 of a pound of food scraps daily.
But, as we discussed in the previous subtopic, stocking density also plays a role in how much worms can eat. For red wigglers, a stocking density of 2 pounds per square foot is recommended. So, if we have a worm bin with 1 square foot of surface area, we can house 2 pounds of red wigglers.
This means that our 1000 red wigglers would need half a square foot of surface area to live comfortably and consume their daily share of food scraps. Of course, we can always add more worms or increase their food supply if we want them to eat more.
How much compost will 1000 worms make?
With 1000 composting worms, you can expect to produce a significant amount of nutrient-rich compost. These worms are capable of consuming up to one-third of their weight in food scraps each day, meaning that 1000 worms can eat their way through a substantial amount of organic material. As a result, they will produce an impressive amount of castings, which are a fantastic soil amendment that can improve soil structure and fertility.
In terms of actual numbers, 1000 red wigglers can produce around 1 pound of castings per day. That equates to roughly 7 pounds of castings per week or 30 pounds of castings per month. Of course, the amount of castings produced will depend on various factors, such as the quality and quantity of the food scraps provided, the temperature and moisture levels in the bin, and the overall health of the worm population.
Nonetheless, 1000 red wigglers can be a valuable addition to any composting system, helping to turn waste into a valuable resource that can nourish plants and soil.
What is the lifespan of a red wiggler?
Now that we know how much compost 1000 worms can make, let’s talk about the lifespan of a red wiggler. As someone who wants to serve the environment and produce their own compost, it’s important to understand the lifecycle of these hardworking creatures.
Red wigglers have a relatively short lifespan of about 1-2 years. During this time, they will go through several stages of development, from a tiny egg to a fully grown adult.
As they mature, they will become more efficient at consuming and processing food waste, which means that their population will grow rapidly. With optimal conditions, a single red wiggler can produce up to 3 cocoons per week, each containing 2-3 baby worms.
This means that a small initial population can quickly turn into a thriving colony that can consume a significant amount of compostable material. By understanding how fast red wigglers reproduce, we can ensure that our composting efforts are sustainable and effective.
How do I know if my worms are happy?
You’ll feel a sense of satisfaction and accomplishment when you see your composting worms thriving, and the key to their happiness is maintaining optimal conditions in their habitat.
The first sign of happy worms is their activity level. If they’re actively moving around and consuming food, that’s a good sign. However, if they’re not moving much and seem lethargic, it may be a sign that something is off in their environment.
Another important factor to consider is the smell of the bin. If it has a strong, unpleasant odor, it could be a sign of overfeeding or other issues. A healthy worm bin should have a pleasant, earthy smell.
Finally, if you see plenty of castings in your bin, your worms are doing well. These castings are a sign that the worms are consuming food and breaking it down into nutrient-rich compost.
By maintaining optimal conditions in your worm habitat, you can ensure that your worms are happy and healthy, and that they’re doing their job of breaking down your food scraps into compost.
Conclusion
Well, there you have it folks! Red wigglers are truly remarkable creatures when it comes to their breeding speed. With the ability to double their population every 60-90 days, it’s no wonder that they are such a popular choice for vermicomposting.
But, as with any living organism, there are certain factors that can impact their breeding rate. Keeping their environment just right, providing them with enough food, and avoiding overstocking are all key to ensuring a healthy and thriving worm population.
In short, red wigglers are like the Usain Bolt of the composting world – lightning fast and highly efficient. So, if you’re looking to start your own worm bin, be sure to do your research and give your wriggly friends the best possible conditions to thrive.
Happy composting!